
Most men tolerate rough skin, deepening lines, and uneven texture as inevitable. Microneedling for men step by step is the guide that changes that thinking. This treatment uses a device covered in fine sterile needles to create controlled micro-injuries in the skin, triggering your body's own repair process to produce fresh collagen and elastin. The result is smoother texture, reduced scarring, softer lines, and skin that genuinely looks younger. More men are turning to advanced skincare solutions because they work, and this guide walks you through exactly how to do it safely.
Table of Contents
- Understanding microneedling and its benefits for men
- Preparing your skin: essential steps before microneedling
- Performing microneedling: a detailed step-by-step guide
- Aftercare and managing recovery downtime effectively
- Expert perspectives: what most guides miss about microneedling for men
- Discover professional microneedling tailored for men at Rivers Edge Skin Studio
- Frequently asked questions
Key Takeaways
| Point | Details |
|---|---|
| Microneedling stimulates natural collagen | Tiny needles create micro-injuries that trigger skin repair and improve texture. |
| Prepare skin by stopping actives | Discontinue retinoids and exfoliants 3–7 days before treatment to reduce sensitivity. |
| Disinfect microneedling tools thoroughly | Sterilisation before and after use is essential to prevent infections. |
| Follow detailed aftercare | Avoid sun exposure and sweating for several days to support healing and avoid irritation. |
| Professional treatment ensures safety | Experienced dermatologists tailor depth and technique for best results and minimise risks. |
Understanding microneedling and its benefits for men
Microneedling works on a simple but powerful principle. Fine sterile needles create minor wounds that stimulate collagen and elastin production, improving skin texture and reducing wrinkles. Your skin interprets these micro-channels as damage and responds by flooding the area with growth factors and new structural proteins. Over the following weeks, that response visibly tightens, smooths, and rejuvenates the treated area.
For men specifically, this matters more than most guides acknowledge. Male skin is roughly 25% thicker than female skin and produces more sebum, which means it tends to develop deeper lines and more pronounced texture irregularities over time. It also scars differently, particularly around areas affected by years of shaving. Microneedling addresses all of these concerns directly rather than sitting on the surface the way a moisturiser does.
The core benefits you can realistically expect include:
- Reduced fine lines and deeper wrinkles, particularly around the eyes, forehead, and mouth
- Improved skin texture, including rough patches and enlarged pores common in male skin
- Fading of acne scars and surgical scars, which respond well to repeated sessions
- More even skin tone, addressing sun damage and post-inflammatory marks
- Stimulated hair follicle activity when used on the scalp, making microneedling for facial hair growth and scalp health an increasingly popular application
- Better absorption of serums and topical treatments applied immediately post-treatment
Exploring men's skin treatments guidance from a specialist clinic is the most reliable way to understand which of these benefits apply most to your specific skin concerns. Now that you understand why microneedling benefits men's skin, let's explore how to prepare correctly for the procedure.
Preparing your skin: essential steps before microneedling
Preparation is where most men either skip steps or get it wrong. The skin needs to be in a calm, non-sensitised state before needles touch it. Arriving with irritated or chemically compromised skin dramatically increases your risk of prolonged redness, hyperpigmentation, or infection.

The most important rule: stop topical retinoids and acids 3 to 7 days before treatment and avoid exfoliators and hair removal to prevent irritation. The stronger the active, the longer the withdrawal period. A mild glycolic toner needs three days off; a prescription-strength tretinoin needs a full week.
Here is a clear reference for timing your skincare adjustments:
| Skincare active | Stop this many days before |
|---|---|
| Prescription retinoids (tretinoin) | 7 days |
| Over-the-counter retinol | 5 days |
| AHAs and BHAs (glycolic, salicylic) | 3 to 5 days |
| Physical exfoliants and scrubs | 3 days |
| Vitamin C serums | 2 to 3 days |
| Waxing and hair removal | 5 to 7 days |
| Sunburn or active tan | Reschedule entirely |
Beyond actives, there are additional steps to take seriously when you prepare skin for microneedling:
- Avoid prolonged sun exposure for at least one week before your appointment
- Stay off blood-thinning supplements such as fish oil, aspirin, and vitamin E for several days prior, unless prescribed by a doctor
- Do not use self-tanning products for two weeks before treatment
- Drink plenty of water in the days leading up to your session; hydrated skin responds better
On the day itself, arrive with a clean face free of makeup or skincare products. No exceptions. Even residue from a morning moisturiser can interfere with the procedure and introduce bacteria into open channels.
Pro Tip: If you are preparing scalp for microneedling treatment, the same rules apply. Wash your scalp with a gentle, fragrance-free shampoo the morning of your appointment and avoid any styling products. Scalp skin is thinner and more reactive than facial skin, so preparation matters even more.
For personalised preparation advice for microneedling, speaking with a specialist before your first session removes all guesswork. With your skin prepared properly, you are ready to move on to the step-by-step microneedling technique.
Performing microneedling: a detailed step-by-step guide
This section covers both professional treatment and at-home dermarolling, because understanding the full process makes you a more informed patient regardless of which route you take. The step-by-step microneedling process follows a clear sequence.
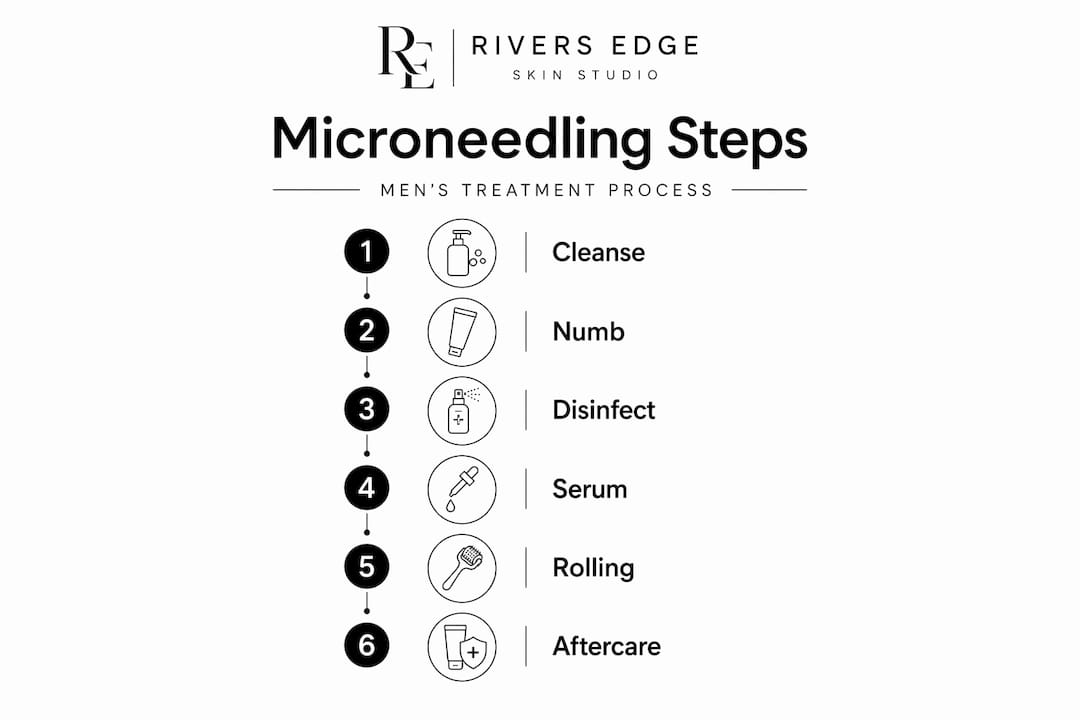
Step 1: Cleanse thoroughly. Wash your face with a gentle, non-active cleanser and pat dry. No toner, no serum, nothing else yet.
Step 2: Apply numbing cream if needed. For professional sessions, a topical anaesthetic is applied 20 to 45 minutes before the procedure. Discomfort is usually manageable with numbing cream and most patients feel only vibration and mild pressure, not pain. At home, numbing is generally not used for shallow dermarolling.
Step 3: Disinfect your device. Disinfect the dermaroller in 70% isopropyl alcohol before and after use. This step is non-negotiable. Skipping it is how men end up with skin infections from what should be a safe treatment.
Step 4: Apply a hydrating serum. Hyaluronic acid is the standard choice. It provides glide for the device and gets driven deeper into the skin through the micro-channels, amplifying the hydrating effect.
Step 5: Begin rolling in sections. Work methodically across the face in sections: forehead, cheeks, chin, nose. Roll 15 to 20 times across each section in horizontal, vertical, and diagonal directions. Use light, even pressure. You are not scrubbing.
Step 6: Cleanse and apply post-treatment serum. Once rolling is complete, cleanse gently with cool water and apply a calming, fragrance-free serum or moisturiser.
Step 7: Follow aftercare immediately. No actives, no sun exposure, no heat. This begins the moment the device lifts from your skin.
Pro Tip: When learning how to microneedle at home, start with a 0.25mm to 0.5mm needle length. Anything deeper than 0.5mm at home significantly increases your risk of scarring and infection. Professional treatments safely reach 1.5mm to 2.5mm because of proper training and sterile conditions.
Here is a practical comparison to help you decide which approach suits your goals:
| Factor | Professional treatment | At-home dermarolling |
|---|---|---|
| Needle depth | 1.0mm to 2.5mm | 0.25mm to 0.5mm |
| Results | Significant, faster | Subtle, slower |
| Safety | High, sterile environment | Moderate, user-dependent |
| Cost | Higher per session | Lower upfront |
| Downtime | 3 to 5 days | Minimal |
| Suitable for scarring | Yes | Limited |
| Scalp and hair growth | Yes | With care |
For detailed microneedling step instructions from trained professionals, a clinic consultation gives you a treatment plan built around your actual skin. Having learned the procedure, it is vital to know how to care for your skin afterwards to ensure safe recovery.
Aftercare and managing recovery downtime effectively
The 72 hours after microneedling are when most men undo their results. The micro-channels created during treatment are open pathways into your skin. What you put on it, and what you expose it to, directly affects whether you heal cleanly or develop complications.
Visible downtime usually lasts 3 to 5 days with peak redness occurring in the first 24 to 48 hours post-treatment. After that, mild flaking and tightness are normal as the skin sheds its outermost layer and begins rebuilding. By day five to seven, most men are back to their normal appearance with noticeably improved texture underneath.
Here is how to manage microneedling aftercare for men day by day:
- Day 1: Expect redness and sensitivity. Use only cool water to rinse. Apply a fragrance-free hyaluronic acid serum and a simple barrier moisturiser. No SPF with chemical filters yet.
- Day 2: Redness begins to settle. Introduce a gentle mineral SPF 30 or higher. Avoid direct sunlight entirely.
- Day 3 to 4: Mild flaking begins. Do not pick or exfoliate. Continue gentle cleansing and moisturising twice daily.
- Day 5 to 7: Skin looks calmer. You may resume your regular men's skincare routine with gentle products.
- Day 7 onwards: Reintroduce actives carefully, starting with lower-strength options before returning to retinoids.
Activities to avoid during the recovery period:
- Sweating heavily through exercise. Avoid sweating and heavy exercise for 48 to 72 hours post-treatment to prevent bacteria entering open channels.
- Swimming in pools or the sea, where chlorine and bacteria are a direct infection risk
- Saunas, steam rooms, and hot showers above a comfortable temperature
- Contact sports where impact or sweat is unavoidable
- Applying makeup after 24 to 48 hours at the earliest, and only once your provider confirms the skin has closed
"The biggest mistake during recovery is rushing back to actives. Your skin is rebuilding. Retinoids, acids, and vitamin C applied too early do not accelerate healing. They interrupt it."
Strict sun protection and gentle skincare for at least one full week after treatment is not optional. UV exposure on freshly treated skin is one of the fastest routes to post-inflammatory hyperpigmentation, particularly in men with medium to darker skin tones. With recovery addressed, let us explore some expert insights and common questions around microneedling for men.
Expert perspectives: what most guides miss about microneedling for men
Here is the uncomfortable reality that generic microneedling guides avoid saying plainly: most at-home microneedling kits are not safe for meaningful results. The needle lengths available over the counter are too shallow to trigger real collagen remodelling, yet deep enough to cause infection if the device is not properly sterilised or the technique is wrong. It is a narrow window of risk with limited reward.
Depth and technique matter critically, especially for patients prone to hyperpigmentation, and microneedling is safest when performed by experienced, board-certified practitioners. For men, this is particularly relevant. Male skin varies enormously in thickness, oil production, and scarring tendency depending on age, ethnicity, and lifestyle. A practitioner who understands these variables adjusts needle depth, pass count, and post-treatment protocol accordingly. A YouTube tutorial cannot do that.
The second thing most guides miss is the importance of timing when reintroducing actives after treatment. The window between stopping actives before your session and restarting them after recovery is not just a safety precaution. It is an opportunity. Your skin is primed and receptive in the weeks following microneedling. Reintroducing a well-chosen retinoid or growth factor serum at the right moment amplifies the collagen response significantly. Getting this wrong in either direction, too early or too late, leaves results on the table.
Pro Tip: Before your first session, book a skin assessment with a specialist rather than jumping straight to treatment. A proper consultation identifies your skin type, flags contraindications such as active acne or rosacea, and ensures the treatment plan is built around your goals rather than a generic template. Explore professional microneedling insight to understand what a tailored consultation looks like in practice.
The men who get the best results from microneedling are not the ones who needle most aggressively. They are the ones who prepare properly, follow aftercare precisely, and work with a practitioner who understands their skin.
Discover professional microneedling tailored for men at Rivers Edge Skin Studio
If this guide has made one thing clear, it is that microneedling done well requires more than a device and good intentions.

At Rivers Edge Skin Studio, every microneedling treatment is designed specifically for male skin. From your first consultation through to aftercare guidance, the focus is on results that are real, not just temporary. The clinic offers personalised treatment plans that account for your skin type, concerns, and lifestyle, including options for scalp microneedling and complementary treatments to support hair growth and overall skin vitality. If you are ready to move beyond guesswork and invest in a treatment that delivers, explore the full range of men's skin treatments and services and book your consultation today.
Frequently asked questions
How long should I stop using retinoids before microneedling?
Stop topical retinoids 3 to 7 days before treatment to reduce irritation and skin sensitivity. Prescription-strength retinoids require the full seven days; over-the-counter retinol generally needs five.
Is microneedling painful?
Most men find it very manageable. Numbing cream means patients feel vibration and mild pressure rather than pain, particularly during professional treatment where topical anaesthetic is applied beforehand.
When can I wear makeup after microneedling?
Makeup can be applied after 24 to 48 hours once the skin's micro-channels have closed and your provider confirms it is safe to do so.
Can I exercise soon after microneedling?
No. Avoid exercise and sweating for 48 to 72 hours post-treatment to prevent bacteria entering open micro-channels and to support proper healing.
Is at-home microneedling as effective as professional treatment?
Significantly less so. Professional microneedling by experienced dermatologists offers safer and more effective results, with needle depths and techniques calibrated to your specific skin type, including men's distinct skin characteristics and pigmentation risks.